Maintaining Users

Menu

File > System Setup > Application Users > User

Mandatory Prerequisites

Prior to creating a User, refer to the following Topics:

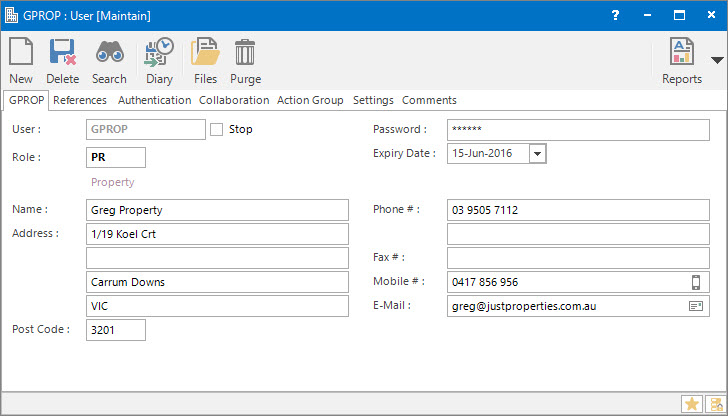
Screenshot and Field Descriptions: User Tab


User: this is the primary identifier for the User.


Stop: this check box determines whether or not a “Stop” has been put on the User. By putting a tick in this check box, this User will not be able to login to the system.


Role: this determines the Role that the User belongs to. It is used to define the Users security privileges and permits ie. Application Permits, Report and Interface Item Permits and Query Permits.


Name: this is the friendly name for the User.


Address / Post Code: this is the address of the User.


Password: this is the User's password. Although password policies are enforced elsewhere in the system, the User screen allows you to set any password you like.


Expiry Date: this is the User's password expiry date. If the User logs-in, on or after this date, they will be required to change their password before continuing. After the initial expiry the next password change date will be set according to the value in the Password Period field for the Role the User is assigned to. This field can also be left blank if you want to force the User to change the password when they next login.


Phone #: this is the User's telephone number.


A/H Phone #: this is the User's after hours telephone number.


Fax #: this is the User's fax number.


Mobile #: this is the User's Mobile telephone number.


E-Mail: this is the User's E-Mail address.

Screenshot and Field Descriptions: Authentication Tab


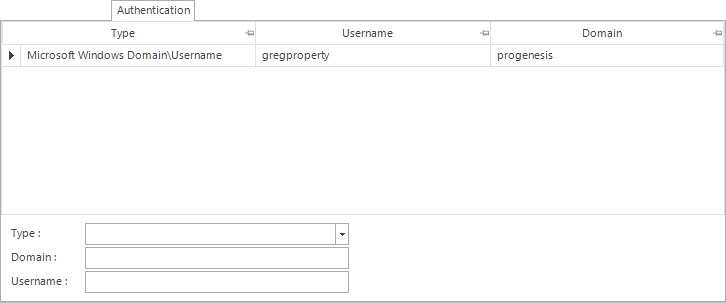
Authentication table: this displays the authentication settings for a User if single sign-on in a Windows network is going to be used to access the system. If implemented the User will not need to enter a password when logging in. Double click a row to populate the fields below the table for editing.


The values in the following fields can be Added, Changed and Deleted using the Maintenance Push-Buttons (Right Hand Side).


Type: this is a drop down list of the authentication types.


Domain: this is the network domain the User is part of.


Username: this is the User's user name for the network domain.

Screenshot and Field Descriptions: Action Group Tab


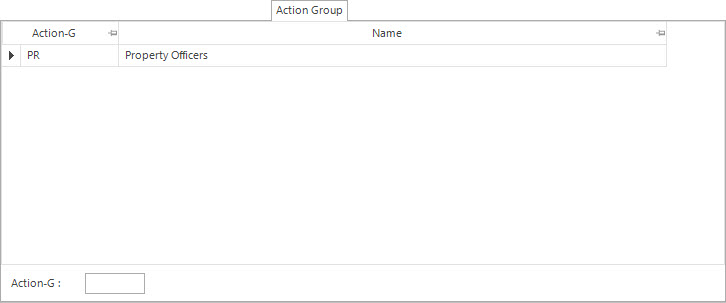
Action Groups table: this displays the Actions Groups this User is part of. A Diary Event is linked to an Action Group to enable all Users in the group to be alerted when it becomes due. Double click a row to populate the fields below the table for editing.


The values in the following fields can be Added, Changed and Deleted using the Maintenance Push-Buttons (Right Hand Side).


Action-G: this is the Action Group to assign the User to.

Shared or Site Optional Tabs

Other than Tabs described specifically in this Topic, the following may also be available (depending on Site Settings):

How Do I : Search For and Maintain Entities

These General Rules are described in the Fundamentals Manual: How Do I : Search For and Maintain Entities

How Do I : Add a new User

  1. At the User field, enter a new User ID.
  2. At the Stop check box, tick if you wish to stop the User from being able to login to the system.
  3. At the Role field, locate the Role you would like to assign this User to. This will define the security privileges and permits for the User.
  4. At the Password field, enter the Users password. This can be subsequently changed by the User at the Log-On screen.
  5. At the Expiry Date field, leave blank to force the User to change their password the next time they login or enter an initial password expiry date.
  6. At the Name field, enter the User's Name.
  7. At the Address / Post Code fields, enter the User's Address.
  8. At the Phone, A/H Phone, Fax, Mobile and E-Mail fields, enter the User's contact details.
  9. Switch to the References tab, and if there are fields available, enter any additional information required.
  10. Switch to the Authentication tab, and enter authentication information if required.
  11. Switch to the Action Group tab, and assign the User to Action Groups if required.
  12. Switch to the Comments tab, and enter any additional comments relating to the User.
  13. Click the Application tool-bar push button: Add.
  14. Confirm that you wish to add the new record.

How Do I : Modify an existing User

  1. At the User field, locate the User.
  2. At the Stop check box, tick if you wish to stop the User from being able to login to the system.
  3. At the Role field, locate the Role you would like to assign this User to. This will define the security privileges and permits for the User.
  4. At the Password field, enter the Users password. This can be subsequently changed by the User at the Log-On screen.
  5. At the Expiry Date field, leave blank to force the User to change their password the next time they login or enter an initial password expiry date.
  6. At the Name field, enter the User's Name.
  7. At the Address / Post Code fields, enter the User's Address.
  8. At the Phone, A/H Phone, Fax, Mobile and E-Mail fields, enter the User's contact details.
  9. Switch to the References tab, and if there are fields available, enter any additional information required.
  10. Switch to the Authentication tab, and enter authentication information if required.
  11. Switch to the Action Group tab, and assign the User to Action Groups if required.
  12. Switch to the Comments tab, and enter any additional comments relating to the User.
  13. Click the Application tool-bar push button: Change.
  14. Confirm that you wish to change the record.

How Do I : Delete an existing User

  1. At the User field, locate the User.
  2. Click the Application tool-bar push button: Delete.
  3. Confirm that you wish to delete the record.

Note: A User record can only be deleted if there are no other records associated with it.  An example would be a Permit associated with a User.

How Do I : Suspend / Reinstate an existing User

The following conditions will cause a User account to be disabled:

  1. When a User exceeds their set number of failed log on attempts.
  2. When a system administrator has disabled the User account by clicking the Stop check box on the User screen.


In each case the system administrator will need to:

  1. At the User field, locate the User.
  2. Click the Stop check box to suspend / reinstate access to the User.
  3. Click the Application tool-bar push button: Change.
  4. Confirm that you wish to change the record.

Related Topics

Users are associated with the following Topics: