Menu
| Home | > | Reports | > | Reports and Interfaces | > | Direct Entry Export |
Mandatory Prerequisites
Prior to running the Direct Entry Export Process, refer to the following Topics:
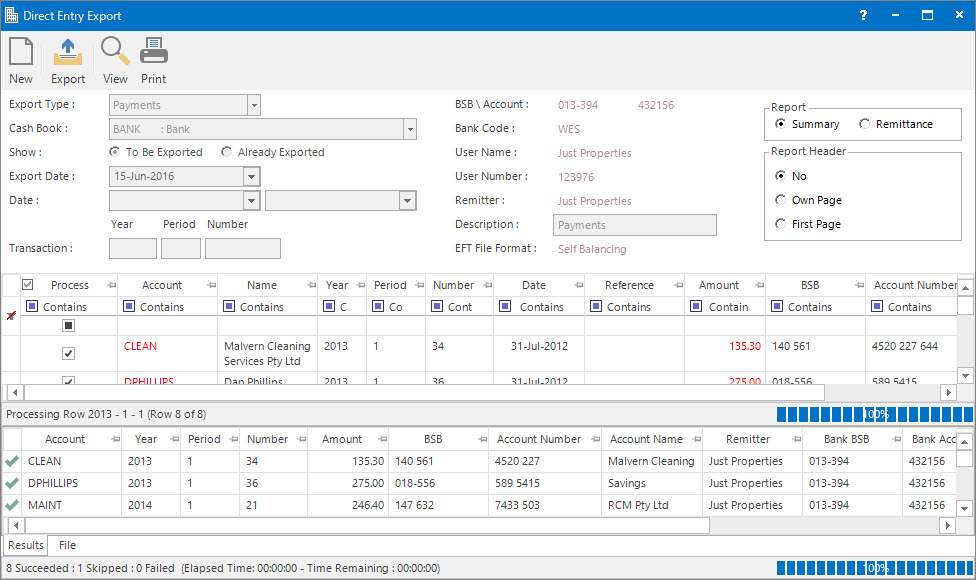
Screenshot and Field Descriptions
Export Type: this is a drop down list of the export file types to create:
- Payments - pay accounts file type.
- Receipts - draw money from accounts file type.
Show: this is the option to display:
- To Be Exported: transactions not exported before.
- Already Exported: transactions previously exported.
Export Date: this is the date associated with the export file. It will be displayed when To Be Exported is selected.
Exported: this is a drop down list of dates on which exports were processed, allowing the user to specify which batch to display or roll-back. It will be displayed when Already Exported is selected.
Date: this is a selection filter for the transaction date range to include.
Transaction (Year / Period / Number): these fields are for filtering the selection of transactions to a particular year, period or individual transaction number.
The following fields display values set up for the Cash Book (Bank Account) in Maintaining Bank Profiles
BSB \ Account: this is the BSB and number for the bank account..
Bank Code: this is an approved Financial Institution abbreviation.
User Name: this is your User Name.
User Number: this is your User Identification Number.
Remitter: this is name of the originator of the entry.
Description: this is the default description of what the file is for. It can be changed for each file.
EFT File Format: this is the Electronic Funds Transfer export file format.
Report: this is the reporting options:
- Summary: list of transactions to be exported or have already been exported.
- Remittance: formal report to send to Creditors listing the invoices that have been paid electronically.
Report Header: this is the options for displaying the report header on the report. This is only enabled when the Report - Summary option is selected.
Source table: this contains rows of transactions to be processed for the export file. The check box in the Process column can be clicked to include / exclude lines.
Results table: this will display the transactions that are processed and ready to be exported.
How Do I : Create a Direct Entry EFT File for paying accounts electronically
How Do I : Create a Direct Entry EFT File for drawing money from accounts electronically
Refer to How Do I : Create a Direct Entry EFT File for paying accounts electronically noting the following fields:
How Do I : Print a Remittance of Invoices paid electronically to send out to Creditors
How Do I : Roll-back a Direct Entry EFT File export
A Roll-back should not be performed if the file has already been uploaded to the Bank.
Direct Entry Export is associated with the following Topics: